> ## Documentation Index
> Fetch the complete documentation index at: https://docs.boothmaven.com/llms.txt
> Use this file to discover all available pages before exploring further.
# Capturing Leads on the Show Floor
> Scan badge QR codes, capture business cards via OCR camera, or use fast manual entry.
## Chapter 16: Capturing Leads
The Capture screen is the heart of the mobile app. Tap the **Capture** tab. At the top, confirm the active event name and booth number match the show you're attending. BoothMaven offers three capture methods:
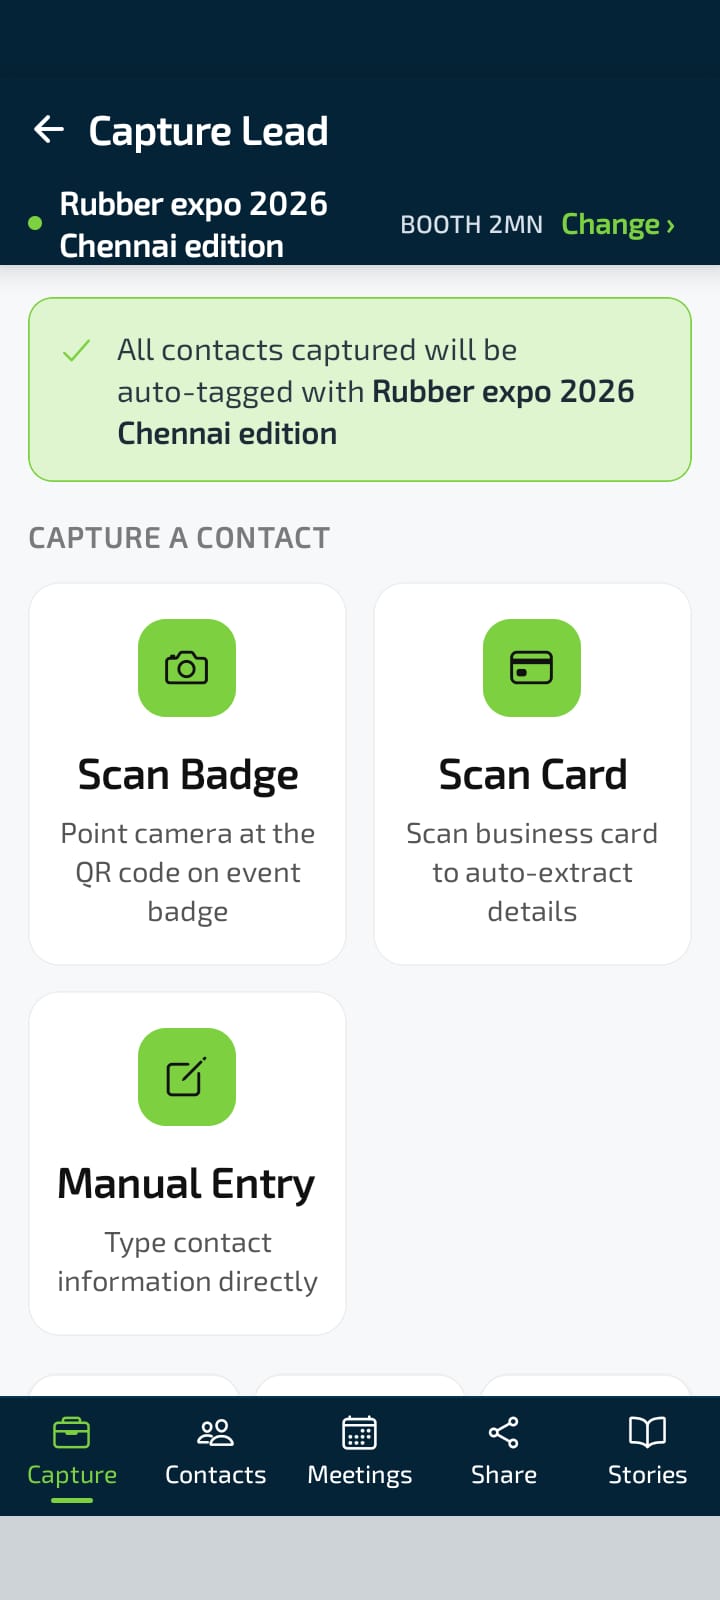 *▲ Capture screen — active event and three lead capture methods*
### 16.1 Scanning a Badge (QR Code)
Most trade shows print a QR code on each attendee's badge. Tap **Scan Badge**. The camera activates and reads the badge QR code instantly, pre-filling the Add Contact form. Review the details, correct any errors, and tap **Save**.
If qualification questions are configured, they appear on the next screen. Answer them immediately or skip to come back later from the contact profile.
Badge scanning is the fastest method on a busy show floor — one scan gives you the lead's full contact details without any typing.
### 16.2 Scanning a Business Card
Tap **Scan Card**. The camera opens with a green alignment frame. Hold the business card flat, align it within the green corners, and keep your hand steady. The app uses OCR to read the card text.
*▲ Capture screen — active event and three lead capture methods*
### 16.1 Scanning a Badge (QR Code)
Most trade shows print a QR code on each attendee's badge. Tap **Scan Badge**. The camera activates and reads the badge QR code instantly, pre-filling the Add Contact form. Review the details, correct any errors, and tap **Save**.
If qualification questions are configured, they appear on the next screen. Answer them immediately or skip to come back later from the contact profile.
Badge scanning is the fastest method on a busy show floor — one scan gives you the lead's full contact details without any typing.
### 16.2 Scanning a Business Card
Tap **Scan Card**. The camera opens with a green alignment frame. Hold the business card flat, align it within the green corners, and keep your hand steady. The app uses OCR to read the card text.
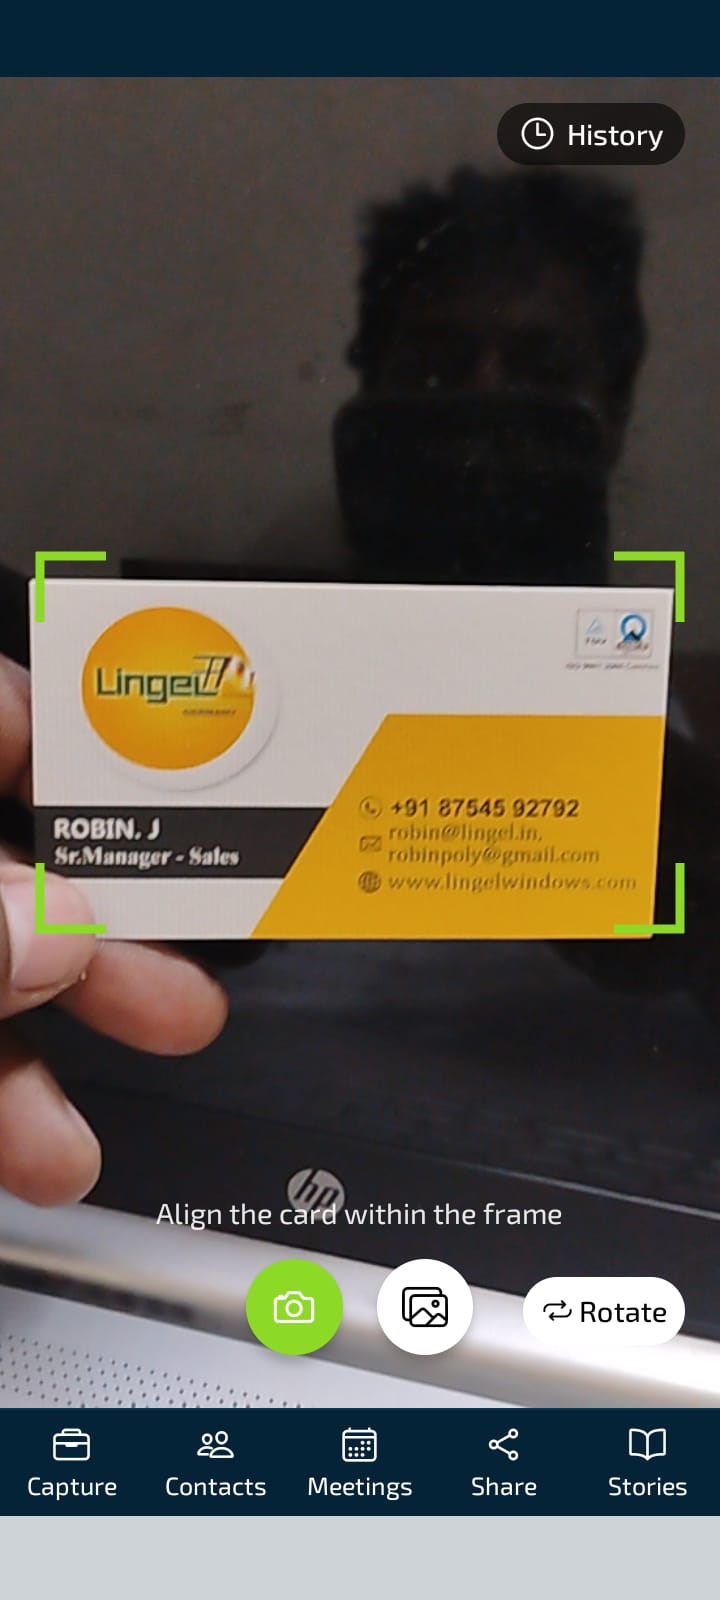 *▲ Card Scanner — align the business card within the green corner frame*
After scanning, the Add Contact form is pre-filled from the OCR result. Review each field carefully — OCR can occasionally misread unusual fonts or small text.
*▲ Card Scanner — align the business card within the green corner frame*
After scanning, the Add Contact form is pre-filled from the OCR result. Review each field carefully — OCR can occasionally misread unusual fonts or small text.
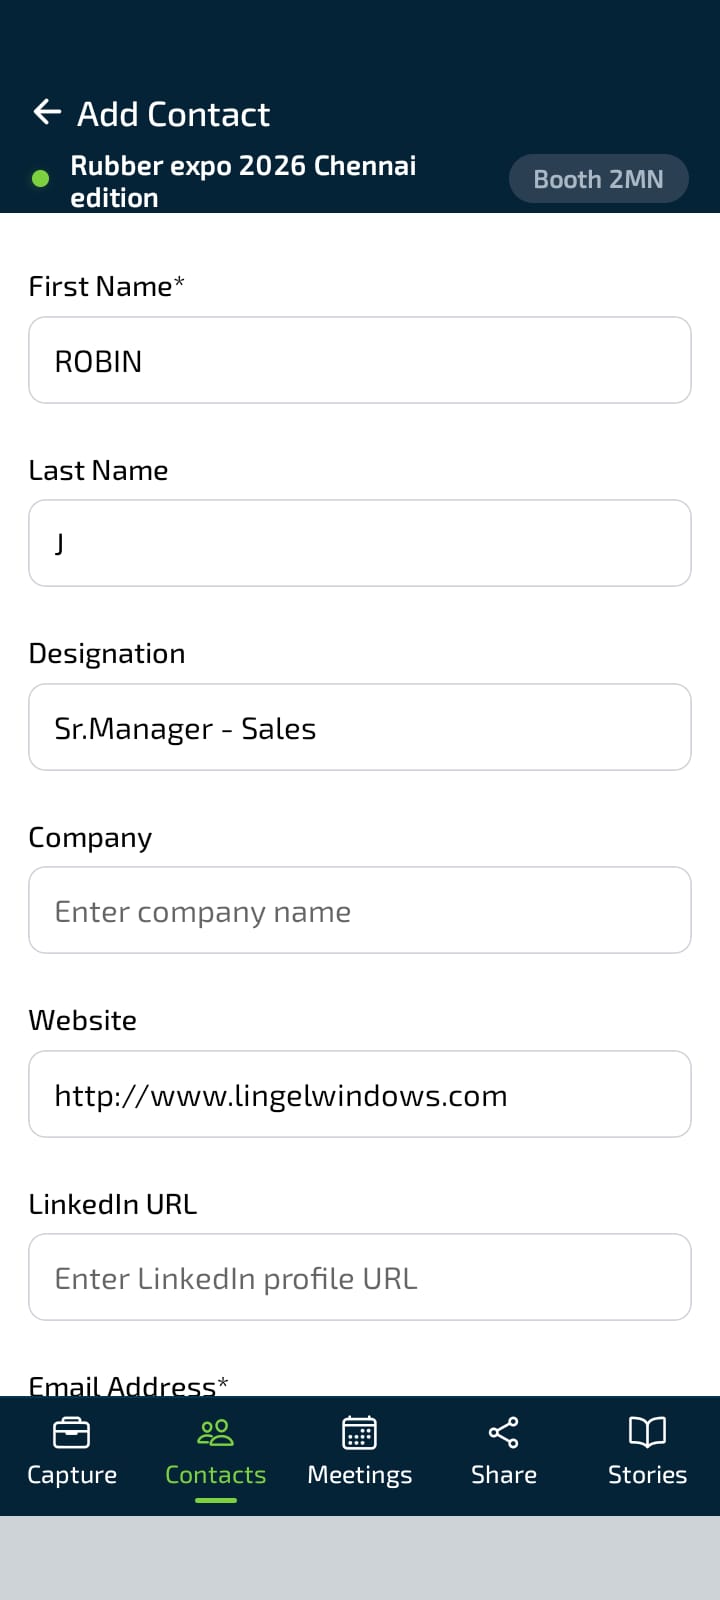 *▲ Add Contact form after card scan — fields pre-filled; review and correct before saving*
The **History** button on the Card Scanner screen shows previous scans so you can review and re-save a card scanned earlier.
### 16.3 Manual Entry
Tap **Manual Entry** when neither a badge QR code nor a business card is available. Fill in the lead's details directly — at minimum a name and either a phone number or email address.
Even a name and company is enough to create a contact. You can always enrich the record later from the contact's profile using the **Enrich** button.
### 16.4 QR Scan History
Every badge or QR code you scan is logged. Access it from **Menu → QR** or from the History button on the Capture screen. The history is organised by date with contact name, date, and time. Tap any entry to view the contact it created.
*▲ Add Contact form after card scan — fields pre-filled; review and correct before saving*
The **History** button on the Card Scanner screen shows previous scans so you can review and re-save a card scanned earlier.
### 16.3 Manual Entry
Tap **Manual Entry** when neither a badge QR code nor a business card is available. Fill in the lead's details directly — at minimum a name and either a phone number or email address.
Even a name and company is enough to create a contact. You can always enrich the record later from the contact's profile using the **Enrich** button.
### 16.4 QR Scan History
Every badge or QR code you scan is logged. Access it from **Menu → QR** or from the History button on the Capture screen. The history is organised by date with contact name, date, and time. Tap any entry to view the contact it created.
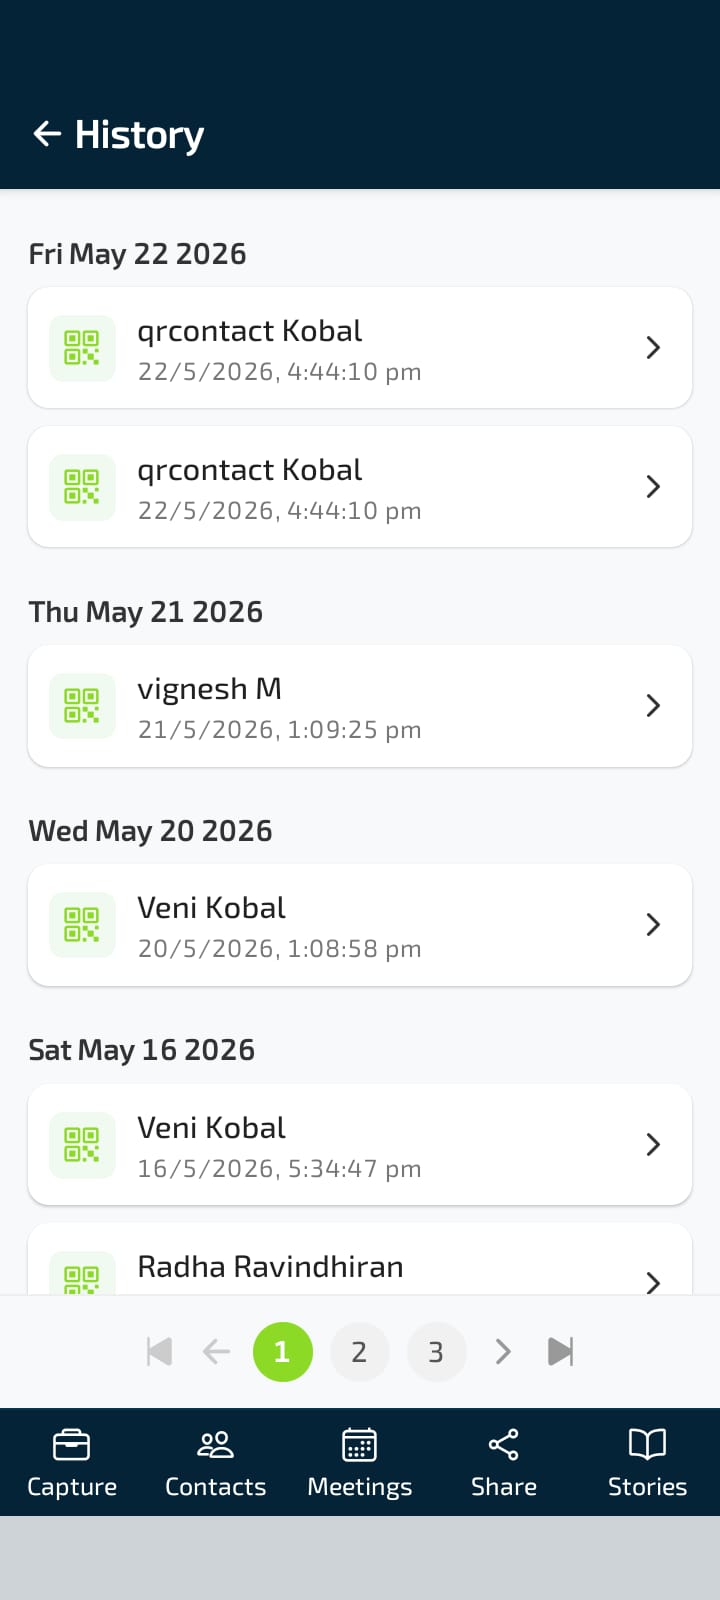 *▲ QR Scan History — chronological log of every badge scan*
***
This documentation is built and hosted on [Mintlify](https://mintlify.com), a developer documentation platform.
*▲ QR Scan History — chronological log of every badge scan*
***
This documentation is built and hosted on [Mintlify](https://mintlify.com), a developer documentation platform.